TL;DR
A bracket order is a three-part order that combines an entry order with a predetermined stop loss and take profit, creating a complete trade management package that executes automatically. When one exit order fills, the other is canceled.
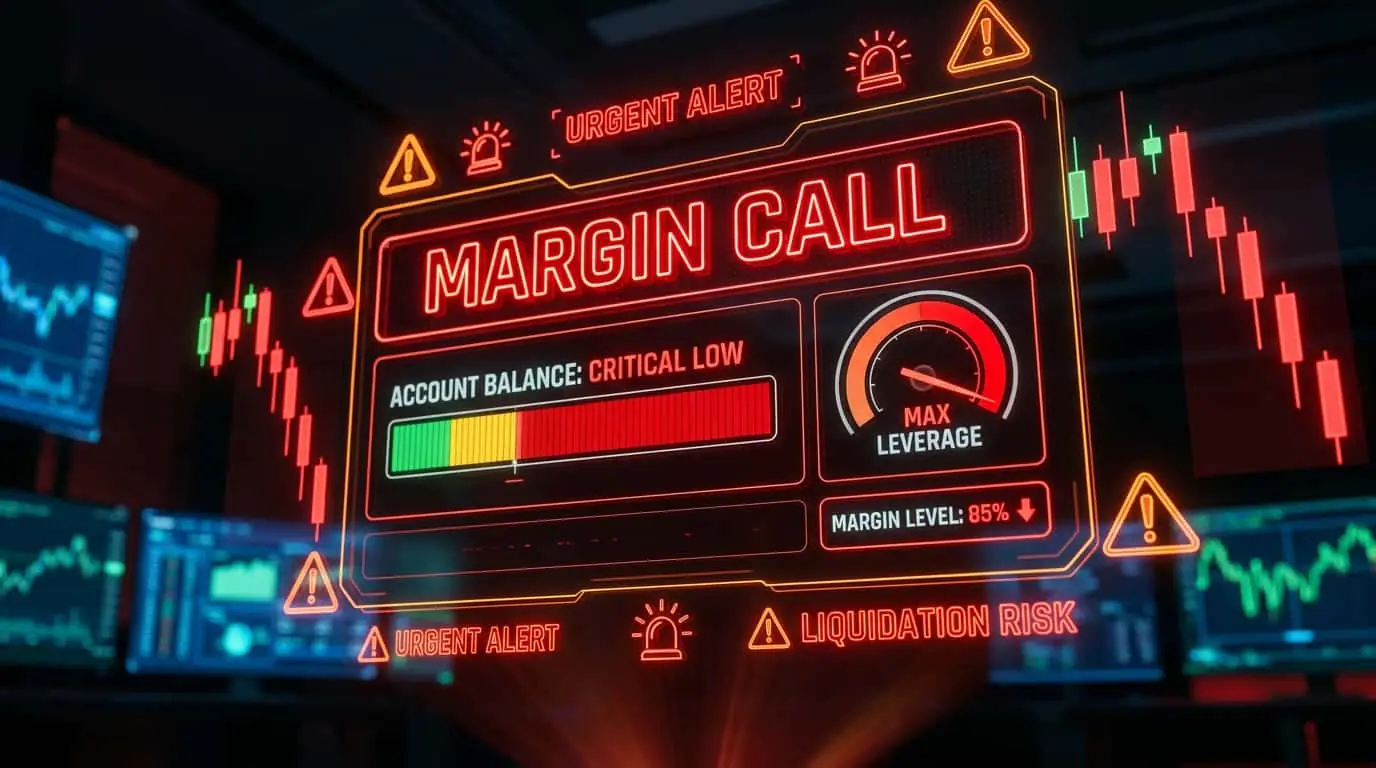
A bracket order is an advanced order type that bundles three orders into a single package: an entry order, a stop-loss order, and a take-profit order. The entry order can be a market order, limit order, or stop order. Once the entry fills, the stop loss and take profit orders are automatically submitted to the exchange, creating a bracket around your position. The bracket ensures that the trade has a defined maximum loss (stop loss) and a defined profit target (take profit). When either the stop loss or take profit fills, the other order is automatically canceled, which is why bracket orders are also called OTO (One-Triggers-Other) or OCO (One-Cancels-Other) orders. This automation removes the need to manually manage exits and ensures that risk management is always in place from the moment the trade opens. Bracket orders are the cornerstone of disciplined trading because they force you to define your complete trade plan before entering the market. Without a bracket, traders often enter positions impulsively and then scramble to set stops and targets while the market is already moving. This post-entry scramble leads to poorly placed stops, emotionally driven targets, and the dangerous habit of trading without risk management. Bracket orders eliminate this entirely by requiring all three components (entry, stop, target) to be defined as a single atomic unit.
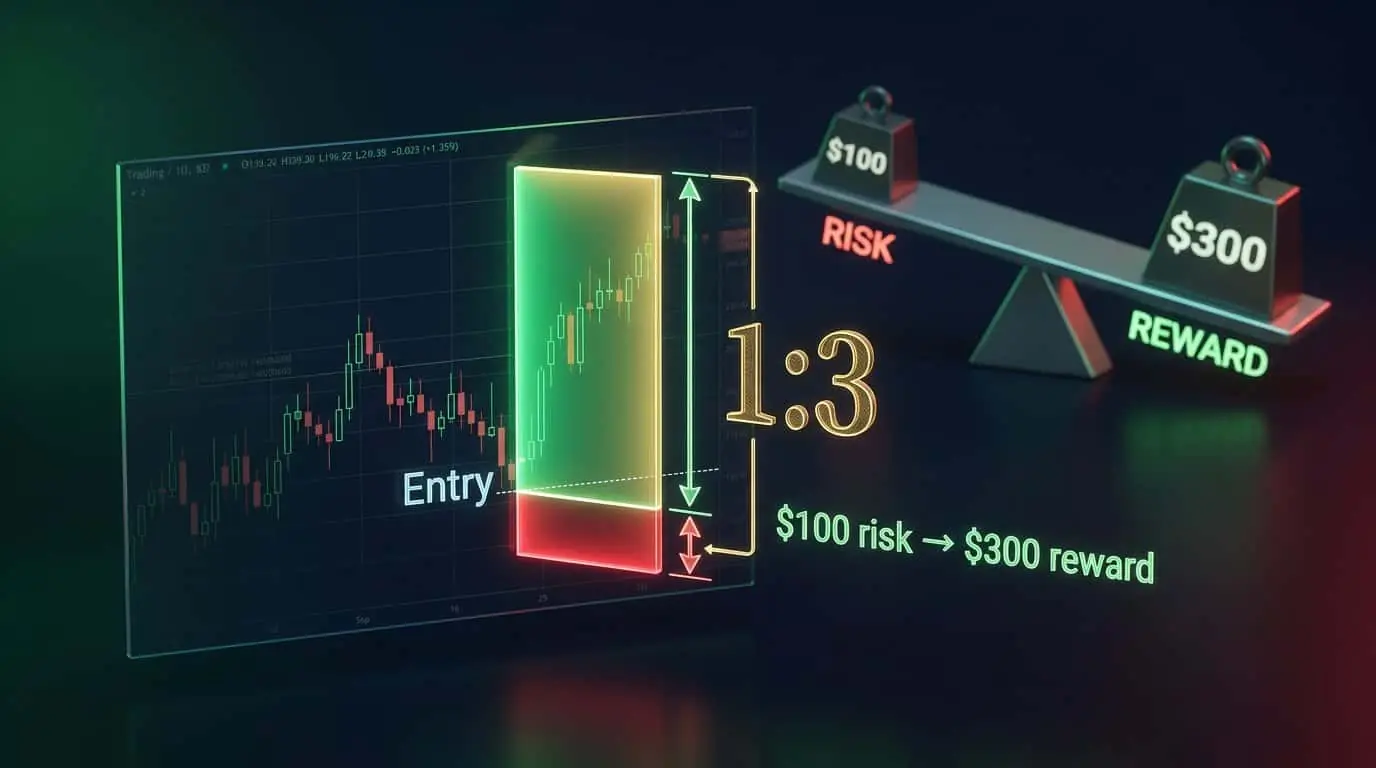
A bracket order works in a specific sequence. First, you define your entry parameters: the entry price or type (market/limit/stop), the quantity, and the direction (buy or sell). Second, you define the stop loss: the distance in ticks, points, or pips below your entry for longs, or above for shorts. Third, you define the take profit: the distance above entry for longs, or below for shorts. When you submit the bracket order, only the entry order is sent to the exchange. The stop loss and take profit are held locally by the platform until the entry fills. Once the entry fills, both exit orders are immediately sent to the exchange. From this point, the position is fully managed. If price hits the take profit first, the position closes at a profit and the stop loss is canceled. If price hits the stop loss first, the position closes at a loss and the take profit is canceled. You do not need to monitor the trade; the bracket handles everything. To illustrate with a detailed futures example, suppose you want to go long ES at the market price of 5200.00 with a 12-tick stop loss and a 24-tick take profit. You submit the bracket: the market buy fills at 5200.00. Instantly, a sell stop-market at 5197.00 (12 ticks below, $150 risk per contract) and a sell limit at 5206.00 (24 ticks above, $300 target per contract) are submitted to the exchange. If price drops to 5197.00, the stop fills and the target at 5206.00 is canceled. You lose $150 per contract. If price rises to 5206.00, the target fills and the stop at 5197.00 is canceled. You gain $300 per contract. The risk-reward ratio is 1:2, and the entire trade was managed automatically.
NinjaTrader implements bracket orders through its ATM (Advanced Trade Management) strategy system. ATM strategies are pre-configured bracket templates that you create and save for reuse. When placing a trade, you select an ATM strategy, and NinjaTrader automatically attaches the stop loss and take profit at the distances you defined. ATM strategies in NinjaTrader go beyond basic bracket orders by supporting multiple profit targets (scaling out at different levels), auto-trail functionality (converting the stop loss to a trailing stop after a specified profit level), break-even stops (moving the stop to entry after a specified profit), and custom stop strategies. You can save multiple ATM templates for different market conditions or strategies. For example, you might have a scalping ATM (tight stop, 1:1 R:R), a day trading ATM (moderate stop, 1:2 R:R), and a swing trading ATM (wide stop, 1:3 R:R). To create an ATM strategy in NinjaTrader, open the Chart Trader or SuperDOM, click the ATM Strategy dropdown, and select Custom. Define your stop loss distance, number of profit targets, quantity allocation per target, auto break-even threshold, and auto trail parameters. Click Save and name your template. The next time you place a trade, simply select this template from the dropdown, and the full bracket will be attached to your entry automatically. You can also clone and modify templates to quickly create variations for different market conditions.
| ATM Feature | Description | Example Setup |
|---|---|---|
| Stop Loss | Fixed protective stop | 12 ticks below entry |
| Take Profit 1 | First profit target (partial exit) | 50% of position at 12 ticks profit |
| Take Profit 2 | Second profit target (remaining) | 50% of position at 24 ticks profit |
| Auto Break-Even | Move stop to entry after X ticks | After 8 ticks profit, stop moves to entry |
| Auto Trail | Begin trailing after X ticks | After 16 ticks, trail by 8 ticks |
| Custom Stop Strategy | User-defined stop adjustment rules | Tighten stop by 2 ticks for every 4 ticks of profit |
Pro Tip
Create at least three ATM strategy templates in NinjaTrader: one for scalping (tight targets, 1:1 R:R), one for day trading (moderate targets, 1:2 R:R), and one for swing trading (wide targets, 1:3 R:R). Having pre-built templates eliminates decision fatigue during live trading.
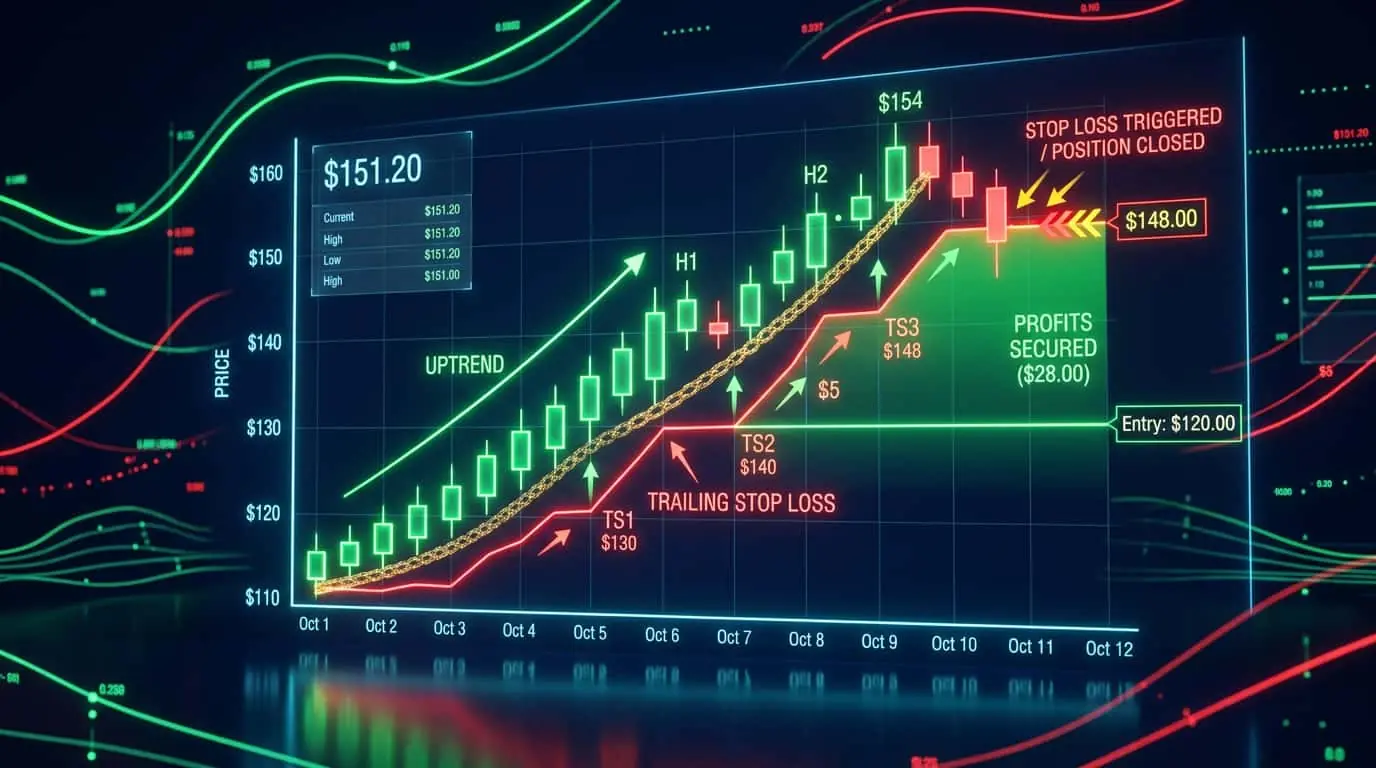
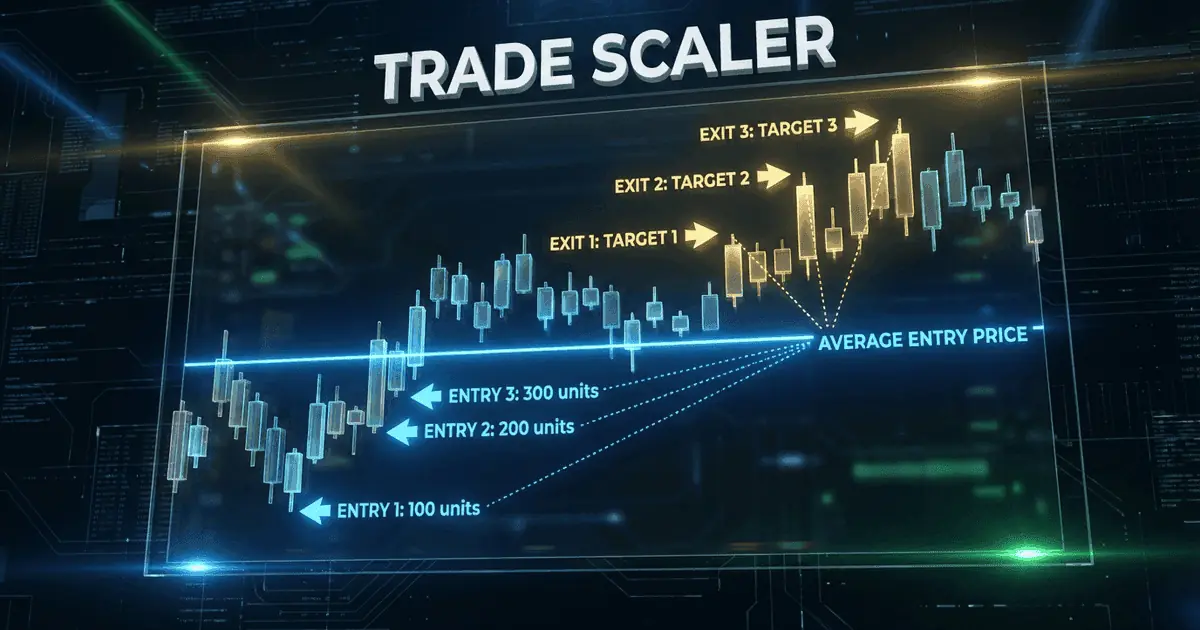
Bracket orders make risk-reward ratio management concrete and automatic. By defining both the stop loss and take profit before entering the trade, you know exactly what your risk-reward ratio is before committing capital. If your stop loss is 10 ticks and your take profit is 20 ticks, your R:R is 1:2. This discipline prevents the common mistake of entering trades without a clear plan for both the maximum loss and the profit target. Bracket orders also enable advanced exit strategies like scaling out. Instead of a single take profit, you can set multiple targets that close portions of your position at different levels. For example, close 50% at 1:1 R:R and move the stop to break-even, then trail the remaining 50% for a potentially larger gain. This approach secures some profit while giving the remaining position room to run. The combination of defined risk, tiered profit targets, and automatic execution makes bracket orders the most professional way to manage individual trades. Consider how scaling out works with a 4-lot ES position. You enter at 5200.00 with a 12-tick (3-point) stop at 5197.00, total risk $600 (4 x $150). Target 1 closes 2 lots at 5203.00 (+3 points, $300 profit), and the stop moves to break-even (5200.00). Target 2 closes the remaining 2 lots at 5209.00 (+9 points, $450 profit) or the trailing stop captures whatever the market gives. The first target secures a partial profit and eliminates risk on the remainder, creating a psychologically comfortable position where the worst outcome is break-even.
Understanding bracket orders in context requires examining specific trading scenarios across different strategies and instruments. In a trend-following day trade on NQ futures, a trader identifies a pullback to the 20-period EMA during an uptrend. The entry is a buy limit at 18,450.00 (the EMA level), with a 40-point stop loss at 18,410.00 ($200 risk per contract) and a 80-point take profit at 18,530.00 ($400 target per contract), giving a 1:2 R:R. The bracket order is placed during the pullback, and if the buy limit fills, the trade is automatically managed. If the market never pulls back to 18,450.00, the limit order expires unfilled and no capital is risked. In a mean-reversion scalp on ES futures, a trader spots price extended 2 ATR above the VWAP. The entry is a sell limit at 5215.00, with a 6-tick stop at 5216.50 ($75 risk) and a 10-tick target at 5212.50 ($125 target), giving a 1:1.67 R:R. This bracket is ideal for a high-probability, small-move setup. In a breakout swing trade on CL (Crude Oil) futures, a trader uses a buy stop entry at 78.50 (above resistance) with a 100-tick stop at 77.50 ($1,000 risk per contract) and a 250-tick target at 81.00 ($2,500 target), giving a 1:2.5 R:R. Each scenario demonstrates how bracket parameters adapt to the strategy's characteristics.
| Strategy | Instrument | Entry | Stop Loss | Take Profit | R:R |
|---|---|---|---|---|---|
| Trend pullback | NQ | Buy limit at EMA | 40 pts below entry | 80 pts above entry | 1:2 |
| Mean reversion scalp | ES | Sell limit at extension | 6 ticks above entry | 10 ticks below entry | 1:1.67 |
| Breakout swing | CL | Buy stop above resistance | 100 ticks below entry | 250 ticks above entry | 1:2.5 |
| Range fade | ES | Buy limit at support | 8 ticks below support | 16 ticks above entry | 1:2 |
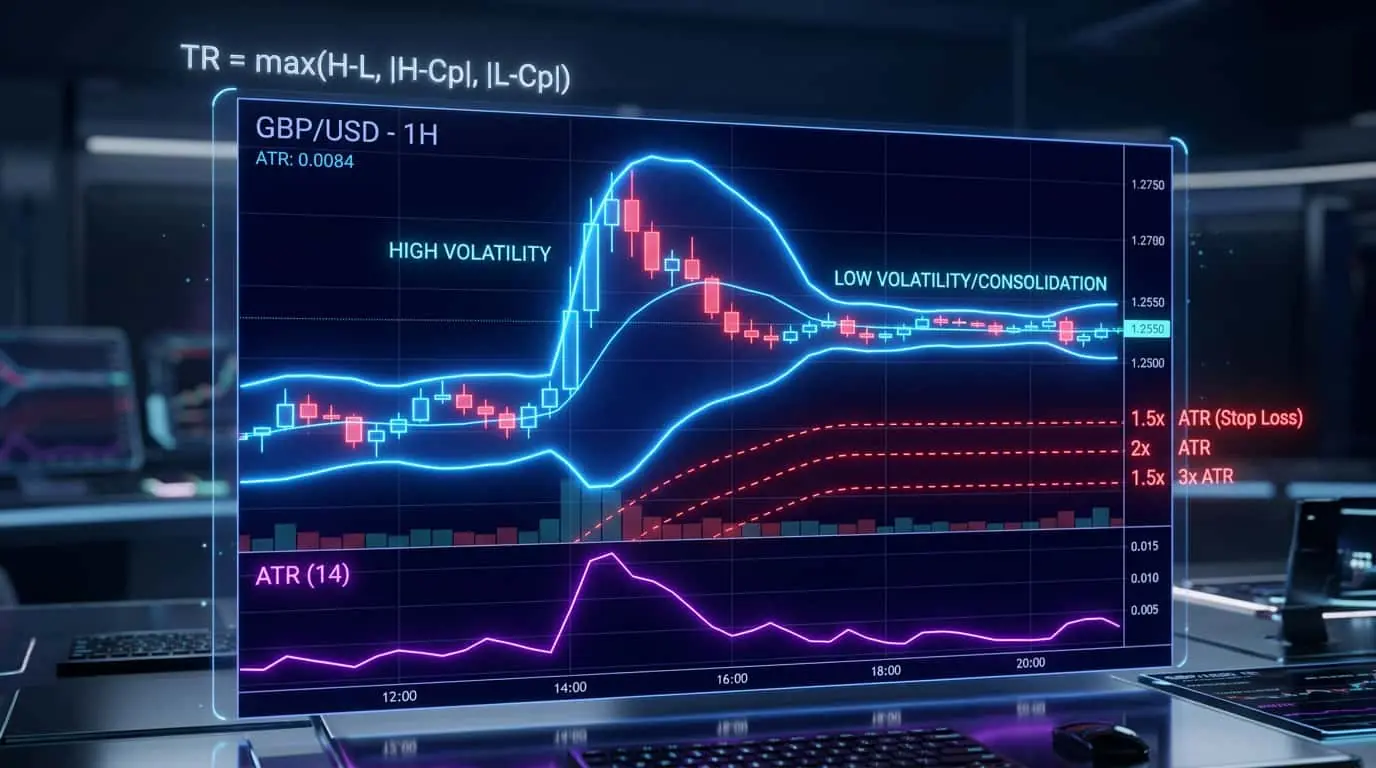
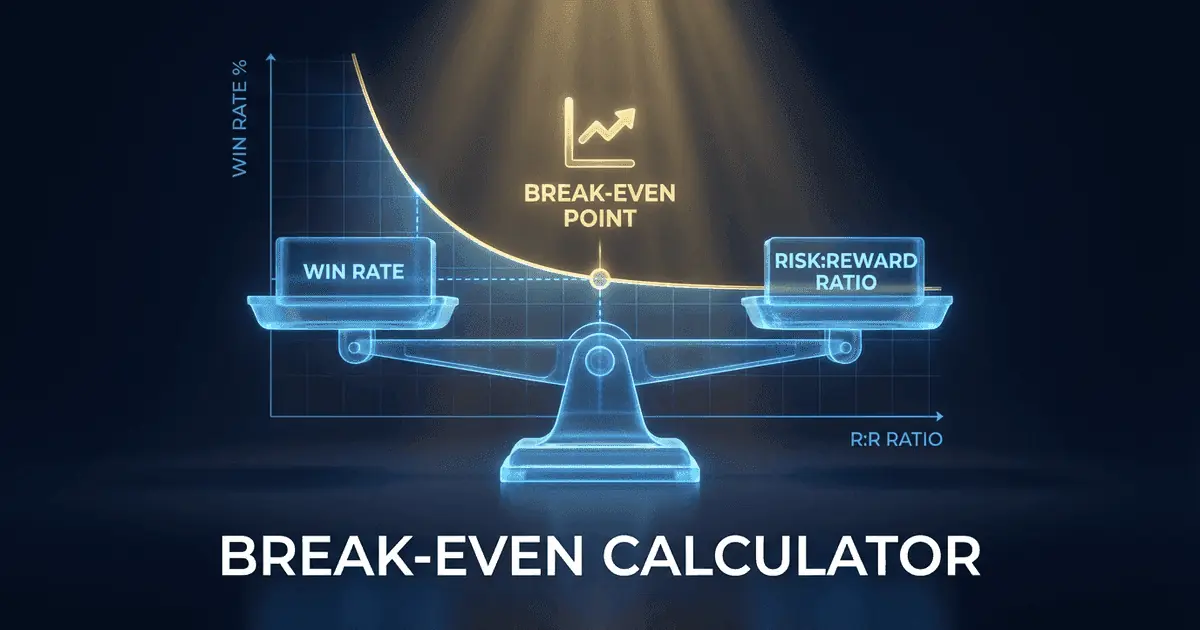
Different trading strategies require different bracket configurations. Scalping strategies typically use tight brackets with a 1:1 risk-reward ratio and small distances (4-8 ticks on ES futures), relying on high win rates for profitability. Day trading strategies use moderate brackets with 1:2 or 1:3 R:R ratios and distances based on ATR (10-20 ticks on ES). Swing trading strategies use wide brackets with 1:2 to 1:5 R:R ratios and larger distances. Breakout strategies often combine stop entry orders with bracket exits, so the bracket only activates if the breakout occurs. Mean reversion strategies use limit entry orders with bracket exits, buying at support with a stop below and take profit at resistance. The key principle is that the bracket parameters should match your strategy's historical performance. If your strategy has a 60% win rate, you can use a 1:1 R:R bracket. If your win rate is 40%, you need at least a 1:2 R:R bracket to be profitable. The relationship between win rate and required R:R is governed by the breakeven formula: Required Win Rate = 1 / (1 + R:R). At 1:1 R:R, you need a 50% win rate to break even. At 1:2 R:R, you only need 33.3%. At 1:3 R:R, you need just 25%. This formula should guide your bracket configuration for every strategy you trade. If backtesting shows your strategy wins 45% of the time, a 1:1 bracket will lose money in the long run, but a 1:1.5 or 1:2 bracket becomes profitable.
| Strategy Type | Typical Win Rate | Minimum R:R | Bracket Distances (ES) |
|---|---|---|---|
| Scalping | 65-75% | 1:1 | Stop: 4-8 ticks, Target: 4-8 ticks |
| Day trading | 45-55% | 1:2 | Stop: 10-16 ticks, Target: 20-32 ticks |
| Swing trading | 35-45% | 1:2.5+ | Stop: 40-80 ticks, Target: 100-200 ticks |
| Breakout | 30-40% | 1:3+ | Stop: 1-2 ATR, Target: 3-5 ATR |
| Mean reversion | 55-65% | 1:1.5 | Stop: below key level, Target: at mean |
Mistake
Entering trades without a bracket (no stop loss or take profit)
Correction
Always use a bracket order or ATM strategy to ensure every trade has a predefined stop loss and take profit. Trading without a bracket exposes you to unlimited risk and requires constant monitoring.
Mistake
Using the same bracket settings for all market conditions
Correction
Create different ATM templates for different volatility conditions. In high-volatility markets, widen your bracket (larger stop and target). In low-volatility markets, tighten it. Base distances on ATR rather than fixed tick values.